Quick Answer:
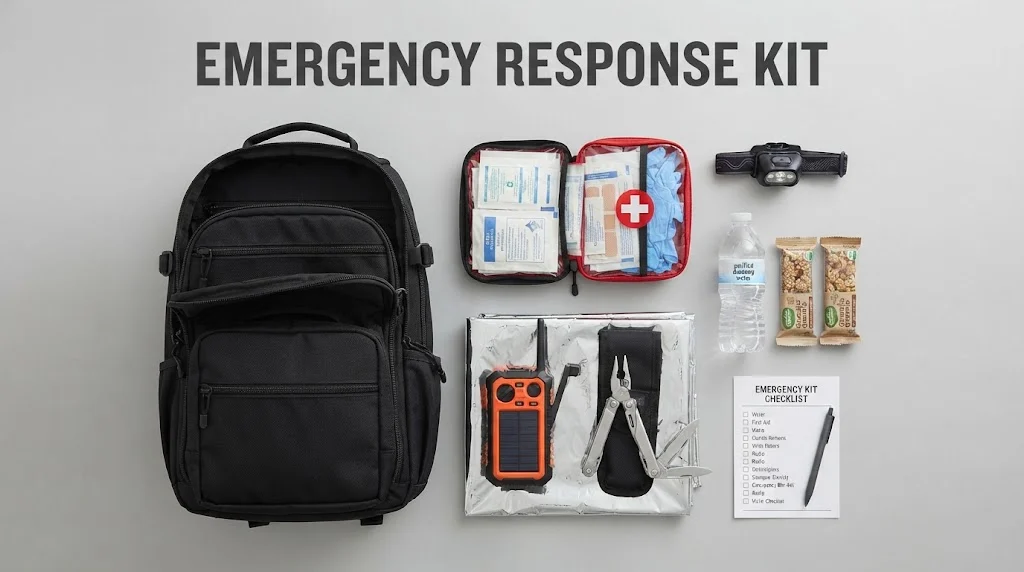
An emergency response kit is a packed set of supplies you can grab fast when something goes wrong. It should cover first aid, water, food, light, and communication. Build one for home, one for your car, and one for work, then check them twice a year.
A power outage at midnight. A fender bender on the highway. A colleague who cuts their hand in the break room. These moments rarely announce themselves. When they happen, you do not want to be digging through drawers or guessing what you have. You want a bag or box that already has what you need.
That is what an emergency response kit does. It removes the scramble. It gives you a reliable set of supplies for the first minutes or hours of a crisis. Whether you are building your first kit or upgrading an old one, the goal is the same: make it practical, make it accessible, and make sure it actually works when you need it.
This guide walks through what to include, how to organize it, and how to avoid the mistakes that leave people unprepared.
What an Emergency Response Kit Actually Is
An emergency response kit is not a single product you buy. It is a collection of items you assemble based on your risks, your space, and the people you need to protect. A kit for a solo apartment dweller looks different from a kit for a family of five with a dog and a car that spends two hours a day on the road.
The core idea is readiness. You want supplies that cover the first 72 hours of a disruption. That window matters because it is often how long it takes for outside help to reach you after a major storm, earthquake, or extended power loss.
Some kits are small. A car kit might fit in a shoe box. A home kit might fill a plastic bin or a backpack. Size is less important than having the right items in a place you can reach without climbing over furniture in the dark.
Core Items Every Emergency Response Kit Needs
You can customize endlessly, but certain categories belong in every kit. Skip these and you are improvising during the worst possible time.
- Water. One gallon per person per day for at least three days. Add a few water purification tablets or a small filter as backup.
- Food. Non-perishable items that do not need cooking. Granola bars, peanut butter packets, canned beans with pull tabs, dried fruit.
- First aid supplies. Bandages, gauze, medical tape, antiseptic wipes, nitrile gloves, tweezers, scissors, a thermometer.
- Light. A headlamp, a small flashlight, and extra batteries. A headlamp keeps your hands free.
- Communication. A battery-powered or hand-crank radio. A portable phone charger. A whistle to signal for help.
- Shelter and warmth. An emergency blanket, a poncho, and a light tarp.
- Tools. A multi-tool, duct tape, a small wrench, and work gloves.
- Medications. A week of prescription meds if possible. Pain relievers, antihistamines, and any personal medical items.
These eight categories cover the basics. Everything else is an upgrade.
Building an Emergency Response Kit for Your Home
Your home kit is the one you will use most. It should live in a spot that is easy to reach but not in the way. A hall closet, a garage shelf, or the bottom of a pantry works well. Avoid the attic and the basement if either floods or gets locked off during a storm.
Start with a durable container. A plastic storage bin with a lid keeps dust and moisture out. A large backpack is better if you might need to evacuate on foot. Label the outside clearly so anyone in the house can find it.
Inside, group items by purpose. Use small pouches or zip-top bags for first aid, tools, and personal items. When everything is mixed together, you waste time searching. When it is grouped, you can grab what you need without unpacking the whole kit.
Include a written list of contents and a family communication plan. If phones are down, knowing where to meet matters more than any gadget.
Emergency Response Kit for Your Car
A car kit handles a different set of problems. You are dealing with breakdowns, bad weather, and long waits for roadside help. Space is tight, so prioritize.
A small duffel bag or a sturdy tote fits behind a seat or in the trunk. Include:
- Jumper cables or a portable jump starter
- A tire pressure gauge and a small air compressor
- Reflective triangles or road flares
- A blanket and warm gloves
- A flashlight with fresh batteries
- A basic first aid kit
- Bottled water and a few high-calorie snacks
- A phone charger that works through the car’s 12V outlet
- A window breaker and seatbelt cutter tool
If you drive in cold climates, add a bag of sand or cat litter for traction. Add an ice scraper and a small shovel. In hot climates, extra water and a sunshade matter more.
Check your car kit every season. Heat and cold degrade batteries, water, and medications.
First Aid Supplies You Should Not Skip
First aid is the heart of most kits. You do not need a hospital-grade setup. You need enough to clean a wound, stop minor bleeding, and stabilize someone until help arrives.
A solid first aid pouch includes:
- Adhesive bandages in several sizes
- Sterile gauze pads and rolled gauze
- Medical tape
- Antiseptic wipes and antibiotic ointment
- Nitrile gloves (at least two pairs)
- Tweezers and small scissors
- Instant cold pack
- Elastic wrap for sprains
- CPR face shield
- Pain reliever and antihistamine
Add a small first aid guide or a printed card with basic instructions. In a stressful moment, reading steps is easier than remembering them.
If anyone in your household has severe allergies, include epinephrine auto-injectors and clear instructions. If someone takes daily medication, rotate a small supply into the kit and replace it before it expires.
Food, Water, and Survival Basics
Food and water are the items people underestimate most. You do not need gourmet meals. You need calories and hydration that do not require electricity or cooking.
For water, store sealed bottles and replace them every six months. Add purification tablets or a straw filter. These take up almost no space and can turn questionable water into safe drinking water.
For food, choose items with a long shelf life and high calorie density. Good options:
- Protein bars and granola bars
- Peanut butter or nut butter packets
- Trail mix
- Canned tuna or chicken with pull tabs
- Dried fruit
- Crackers
- Hard candy for quick energy
Avoid anything that needs a can opener, a stove, or added water. If you include canned goods, pick pull-tab lids.
Add a small mess kit or a few disposable bowls and utensils. A manual can opener is a smart backup even if you mostly buy pull-tab cans.
Tools and Communication Gear
Tools turn a kit from passive supplies into an active response system. You do not need a full workshop. You need items that solve common problems.
A multi-tool covers cutting, screwing, and prying. Duct tape fixes a surprising range of issues. Work gloves protect your hands when you move debris or change a tire. A small wrench can shut off a gas valve if you know how.
For communication, a hand-crank radio keeps you informed when cell networks fail. A portable power bank keeps your phone alive for a few extra charges. A whistle is louder than your voice and takes no energy to use.
Write down important phone numbers on paper. If your phone dies and you cannot charge it, a paper list still works.
Organizing and Storing Your Kit
Organization is what separates a useful kit from a pile of stuff. Use clear containers. Label everything. Keep like items together.
A simple system:
- One pouch for first aid
- One pouch for tools
- One pouch for personal items (medications, glasses, copies of ID)
- One bag for food and water
- One bag for clothing and warmth
Store the kit where you can reach it without a flashlight. If you need light to find your light, the system has failed.
For home kits, pick a spot that stays dry and stays cool. Heat damages batteries and medications. Moisture ruins gauze and matches. A closet shelf or a sturdy bin in a climate-controlled room works well.
Tell everyone in the household where the kit lives. Show them how to open it. A kit that only one person knows about is half a kit.
Maintaining Your Emergency Response Kit
A kit you build once and forget is a kit that will let you down. Batteries leak. Water expires. Medications lose potency. Food goes stale.
Set two reminders each year. A good schedule is spring and fall, when you change clocks or switch seasonal gear. During each check:
- Replace expired food and water
- Test flashlights and radios
- Check battery dates
- Rotate medications
- Confirm clothing still fits (especially for kids)
- Update your contact list and family plan
- Restock anything you used
Write the next check date on a card inside the kit. That small step keeps the kit alive.
Emergency Response Kit for the Workplace
Workplace kits serve a different purpose. They are often shared, so they need to be obvious and simple. People should not have to guess what is inside or how to use it.
A basic workplace kit includes:
- A large first aid kit with burn gel and eye wash
- Flashlights for each floor or zone
- A battery-powered radio
- Emergency blankets
- Water and non-perishable snacks for a small team
- A laminated list of emergency contacts and evacuation routes
- A whistle or air horn to signal for help
Assign one person to check the kit monthly. Keep a log taped to the lid. When items get used, replace them right away. A missing item is worse than a missing kit because it creates false confidence.
If your workplace has specific hazards, like a lab or a workshop, add supplies for those risks. Consult your safety officer or follow your organization’s emergency plan.
Common Mistakes When Building an Emergency Response Kit
Most kit problems come from a few predictable errors. Avoiding these puts you ahead of the average household.
Buying a pre-made kit and never opening it. Pre-made kits are a starting point, not a finished product. Open it. Check the contents. Add what is missing for your situation.
Storing the kit somewhere inconvenient. If the kit is in a locked shed or under a pile of boxes, you will not use it. Accessibility beats organization every time.
Forgetting personal needs. Generic kits do not include your prescriptions, your glasses, your child’s inhaler, or your pet’s food. Add those items.
Skipping maintenance. A kit with dead batteries and expired food is just a heavy box. Set reminders and stick to them.
Making it too heavy to carry. If you might need to evacuate, you need to be able to lift the kit and walk. Test the weight. Split supplies into two bags if needed.
Ignoring the car. Many people build a home kit and forget the vehicle. Your car is where you spend a lot of time. Treat it as a second location.
FAQs
How often should I replace the water in my emergency response kit?
Replace sealed bottled water every six months. If you use water pouches with a longer shelf life, follow the printed expiration date. Write the replacement date on the bottle or on a card inside the kit. Rotating water is cheap and fast, and it prevents the unpleasant surprise of stale or leaking bottles.
Can I build a kit on a tight budget?
Yes. Start with the basics: water, a few non-perishable snacks, a flashlight, bandages, and a whistle. Add one item per shopping trip. Dollar stores and discount retailers often carry useful supplies. The goal is progress, not perfection. A small kit today beats a perfect kit you never finish.
What is the difference between a first aid kit and an emergency response kit?
A first aid kit handles injuries. An emergency response kit covers injuries plus water, food, light, communication, shelter, and tools. The first aid kit is one part of the larger kit. You can buy them separately or build one combined system.
Do I need a kit if I live in a city with fast emergency services?
Yes. Fast services still take time during a major event. A city earthquake, an extended blackout, or a transit shutdown can delay help for hours. A small kit gives you comfort and safety while you wait. You do not need a bunker. You need a bag with water, a light, and a few basics.
What should I put in a kit for a pet?
Pack pet food, a collapsible bowl, a leash, a copy of vaccination records, and any medications. Add a recent photo of your pet in case you get separated. If your pet needs a carrier, keep it near the kit. Pets are family, and they need their own supplies.
How do I store medications in a kit without them expiring?
Rotate them. Keep a small supply in the kit and replace it every few months with fresh medication from your regular supply. Do not hoard. Use the oldest medication first in your daily routine and move newer doses into the kit. This keeps the kit stock fresh without waste.
Should I keep a kit in my car and my home?
Yes, if you can. Car and home kits serve different situations. A home kit is larger and covers shelter-in-place. A car kit is smaller and covers breakdowns and travel delays. If you can only build one, start with the home kit, then add a car kit when budget allows.
What is the most commonly forgotten item in an emergency response kit?
A manual can opener. Many people pack canned food and forget the tool to open it. Other commonly forgotten items include a whistle, a paper list of phone numbers, and a spare pair of glasses. Walk through a realistic scenario in your head and note what you would reach for. Then add it.
Conclusion
An emergency response kit is a simple idea with a big payoff. It turns a chaotic moment into a manageable one. Build it around your real life, store it where you can reach it, and check it twice a year. A little planning now saves a lot of stress later.
Read More Related Articles :
- 150+ Best Responses To Security Detection And Response That Actually Convert In 2026
- 150+ Best Responses To Network Detection Response That Actually Convert In 2026
- 150+ Best Responses To Security Incident Response AI Agent That Actually Convert In 2026

James Wilson is a passionate blogger and writer at RespondLabs.com, sharing fresh perspectives on technology, business and everyday digital trends. His writing combines clear insights with an engaging, reader-friendly style.